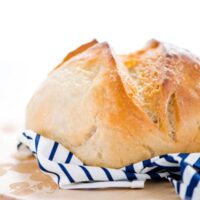
4-Ingredient Gluten Free Sourdough Bread Recipe
This 4-Ingredient Gluten Free Sourdough Bread recipe is perfect start with if you’re new to sourdough bread baking. It’s easy to make with clear directions and a written baking schedule.
Servings: 1 Loaf
Print
Pin
Ingredients
- 200 grams un-fed Gluten-Free Sourdough Starter see notes
- 420 grams Bob's Red Mill 1:1 Gluten-Free Baking Flour see note 10
- 300 grams bottled water cold or room temperature
- 12 grams fine sea salt
Instructions
Day 1 (Around 12 pm)
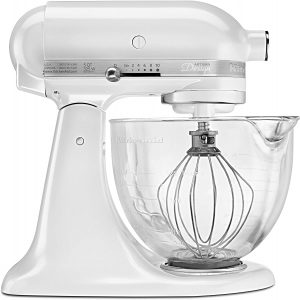
- Make the dough: Add the un-fed starter, gluten-free flour, water, and salt to the bowl of a stand mixer. Use the dough hook to mix until all ingredients are combined, the dough comes together, and there isn't any loose flour left.
- Bulk Fermentation: Gently form the dough into a ball and place in a lightly oiled and floured medium glass bowl. Loosely cover and leave in a draft-free place for 6-10 hours. 6 hours if your house is on the warm side and up to 10 hours if your house is cooler. I generally let mine rise for about 8 hours. At this point, you don't want your dough to double in size.
- 2nd Proof/Retard (around 8pm): After the first rise, transfer the bowl to the refrigerator to finish proofing in the refrigerator for 12 hours. You can keep the dough in the same bowl or you can gently reshape it and place it in a floured Banneton Basket.
Day 2 (Around 8 am)
- Place your Dutch Oven on the center rack and preheat the oven to 500 degrees. Let the Dutch Oven preheat at 500 degrees for at least 30 minutes.
- When the Dutch Oven has preheated, remove from the dough from the refrigerator. Turn the dough out onto a piece of lightly floured parchment paper.
- With generously floured hands, gently re-shape to a tighter ball and use the flour to smooth the dough. The dough should be completely coated with a layer of flour. (Skip this if you proofed in a Banneton Basket)
- Use a sharp knife or bread lame to slash the bread, you want the slash to be at least 1-inch deep. You can make it decorative or keep it simple to start and just do an X in the middle.
- Remove the Dutch Oven from the preheated oven. Use the corners of the parchment paper to lift the dough and carefully place it in the Dutch Oven so you don't burn yourself. Place 2 large ice cubes in the Dutch Oven between the parchment paper and sides of the DO and quickly cover with the lid.
- Place the Dutch Oven back on the center rack and lower the temperature to 450 degrees. Bake at 450 for 40 minutes.
- After 40 minutes lower the oven temperature to 425 degrees and then remove the lid from the Dutch Oven. Bake for an additional 40 minutes, uncovered, at 425 degrees.
- When the bread is done, it should have an internal temperature of at least 210 degrees and the bottom of the bread should sound hollow when you knock on it. Cool completely on a wire rack before slicing and serving.
Notes
- The sourdough starter used and tested in this recipe is made with Bob's Red Mill 1:1 Gluten-Free Baking Flour. It's a 100% hydration starter, which means it's made with equal parts flour and water.
- The flour blend I use contains xanthan gum. For best results use the flour listed in the recipe or another high-quality gluten-free flour blend that already contains xanthan gum.
- Tap water can be subbed as long as it hasn't been chemically treated. Chlorine will kill the active cultures and wild yeast.
- This dough can be mixed by hand if you don't have a stand mixer. I use a Danish Dough Whisk to mix it.
- The sourdough bread process is not the same as traditional sourdough bread made with wheat flour. There's no stretching or folding of the dough during the bulk fermentation. With gluten-free dough, the bulk fermentation is just the first rise.
- I finish proofing the dough in the refrigerator, sometimes referred to as Retard. It slows down the rise and helps prevent over-proofing your dough.
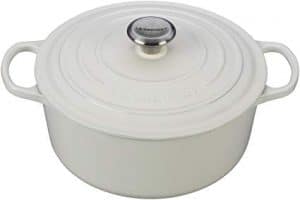
- I use a 5.5 quart Dutch Oven to bake this bread. If you don't have a Dutch Oven, you can use a cast-iron skillet and cover the bread with aluminum foil for the 1st half of the baking process. Be careful not to burn yourself when covering with foil.
- It's important to cool the bread completely before slicing.
- This bread is best served toasted. Think toast for breakfast, garlic bread, etc.
- To make this bread with a flour blend that doesn't contain xanthan gum, mix 15g whole Psyllium Husk with the water and let it sit until it gels. Then mix the ingredients and follow the directions as indicated.
Recommended Products


Nutrition Information
Serving: 1g | Calories: 189kcal
Disclaimers
As an Amazon Associate and member of other affiliate programs, I earn from qualifying purchases.
Nutrition Facts are estimated and aren't always accurate. Please consult a doctor or nutritionist if you have special dietary needs.
Did you make this?Mention @whattheforkfoodblog or leave a comment rating below!