
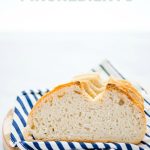
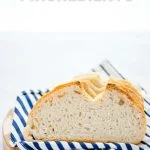


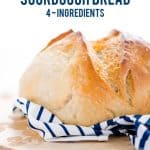

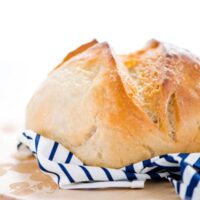
This 4-Ingredient Gluten Free Sourdough Bread recipe is perfect start with if you’re new to sourdough bread baking. It’s easy to make with clear directions and a written baking schedule.

This post contains affiliate links for products and ingredients I use and love. You can read my full disclosure here. Thank you for supporting What The Fork Food Blog so I can continue to provide you with free gluten free recipes ♥
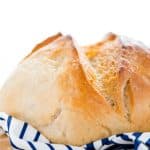
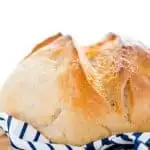
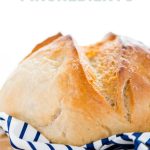
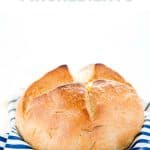
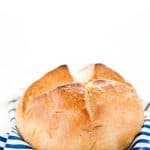
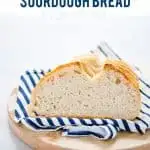
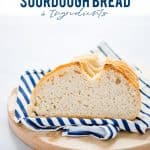
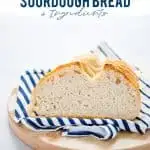
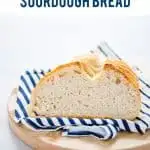
Gluten Free Sourdough Bread with just 4 ingredients
Making sourdough bread doesn’t have to be intimidating or complicated. I’ve simplified and streamlined the process to make it easier and approachable.
Instead of using a long list of ingredients, I’ve narrowed it down to just 4 ingredients with a popular 1:1 gluten free flour blend as the main ingredient in both the bread and the sourdough starter. This is a basic sourdough bread recipe and I’m not exaggerating because 4 ingredients is a basic as you can get, even with traditional sourdough bread made with wheat flour.
Just 4 ingredients and one of them is the gluten free sourdough starter – which is just flour and water. Since flour and water are also ingredients in the bread, you can technically say this bread is really only 3 ingredients.
Like traditional sourdough bread, this recipe doesn’t call for commercial yeast. It relies on the wild yeast and good bacteria that we cultivated in our sourdough starter to leaven the bread. It’s a good old fashioned science experiment, my friends!
It’s back to the basics with this one and is as close to mimicking traditional sourdough bread as you can get. Thanks to using a 1:1 gluten free flour blend (that contains xanthan gum), you don’t have to mix your own combination of flours or experiment with binders like psyllium husk, psyllium powder, or flax meal.
If you’re just starting out in the world of gluten free sourdough bread baking, I highly suggest starting with this recipe. The gluten free sourdough starter I used in this recipe is made with the same 1:1 gluten free flour blend that I use in the bread. Because the gluten free starter has xanthan gum in it, I suggest following the recipe exactly before experimenting with different starters and hydration percentages.

Did you make this recipe? Leave a star rating and let me know in the comments! You can also leave a photo/comment on this pin for others to see.
Is Sourdough Bread Gluten Free?
A frequently asked question I see a lot in gluten free Facebook groups is, “Is sourdough bread gluten free?”. The answer is simple – yes, if it’s made with gluten free flour and a gluten free sourdough starter.
Sourdough bread made with regular wheat flour or a wheat-based sourdough starter is not gluten free.
Some who are sensitive to gluten or gluten intolerant are able to eat wheat-based sourdough and they can digest it without issue but regular sourdough bread is not safe for those with Celiac Disease.
As an Amazon Associate I earn from qualifying purchases.
Key Ingredients for a 4-Ingredient Gluten Free Sourdough Bread
- Gluten Free Flour – for this recipe, I use Bob’s Red Mill 1:1 Gluten Free Baking Flour which contains xanthan gum. If you use a different flour blend, make sure it already has xanthan gum in it. I haven’t tested this recipe with other flours so I can’t guarantee the same results.
- Water – bottled/filtered water is best. I use tap water from a well and it works fine because it’s not chemically treated. If you have city water, you’ll have to boil it and cool it to room temperature before using.
- Salt – I use fine sea salt
- Gluten Free Sourdough Starter – the sourdough bread starter I used for this recipe is made with Bob’s Red Mill 1:1 Gluten Free Baking Flour.
Equipment Needed to Make Homemade Sourdough Bread
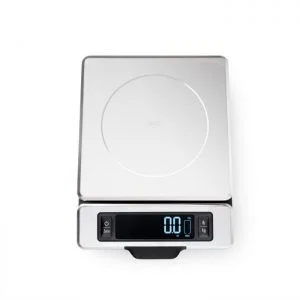
- Digital Kitchen Scale – I measure all the ingredients for this recipe by weight so a Digital Kitchen Scale is necessary.
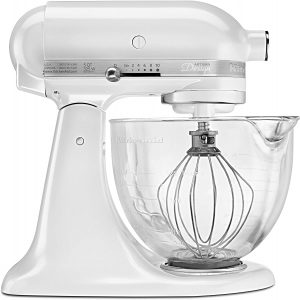
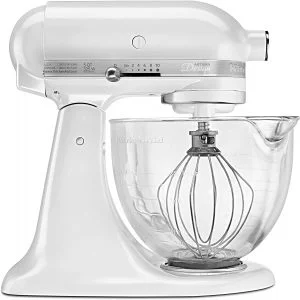
- Stand Mixer with Dough Hook or a Danish Dough Whisk – A KitchenAid Stand Mixer makes a quick and easy job of mixing up the dough. However, this recipe can be mixed by hand with a wooden spoon or a Danish Dough Whisk.
- Dutch Oven – this recipe is best when baked in a 5.5 Quart Dutch Oven. However, if necessary, you can bake this in a cast-iron skillet with aluminum foil in place of the lid. A loaf baked in cast iron will have a much darker and thicker/tougher crust.
- Glass Bowl or Banneton Basket – I use the largest bowl from this Pyrex set to proof my breads and loosely cover it. It’s the perfect size and glass is a non-reactive material. Ceramic would also be ok to use but don’t use a metal bowl.


How to Make Sourdough Bread with Gluten-Free Flour
Day 1 (Around 12 pm)
Make the dough: Add the un-fed starter, gluten-free flour, water, and salt to the bowl of a stand mixer. Use the dough hook to mix until all ingredients are combined, the dough comes together, and there isn’t any loose flour left.
Bulk Fermentation: Gently form the dough into a ball and place in a lightly oiled and floured medium glass bowl. Loosely cover and leave in a draft-free place for 6-10 hours. 6 hours if your house is on the warm side and up to 10 hours if your house is cooler. I generally let mine rise for about 8 hours. At this point, you don’t want your dough to double in size.
2nd Proof/Retard (around 8pm): After the first rise, transfer the bowl to the refrigerator to finish proofing in the refrigerator for 12 hours. You can keep the dough in the same bowl or you can gently reshape it and place it in a floured Banneton Basket.
Day 2 (Around 8 am)
- Place your Dutch Oven on the center rack and preheat the oven to 500 degrees. Let the Dutch Oven preheat at 500 degrees for at least 30 minutes.
- When the Dutch Oven has preheated, remove from the dough from the refrigerator. Turn the dough out onto a piece of lightly floured parchment paper.
- With generously floured hands, gently re-shape to a tighter ball and use the flour to smooth the dough. The dough should be completely coated with a layer of flour. (Skip this if you proofed in a Banneton Basket)
- Use a sharp knife or bread lame to slash the bread, you want the slash to be at least 1-inch deep. You can make it decorative or keep it simple to start and just do an X in the middle.
- Remove the Dutch Oven from the preheated oven. Use the corners of the parchment paper to lift the dough and carefully place it in the Dutch Oven so you don’t burn yourself. Place 2 large ice cubes in the Dutch Oven between the parchment paper and sides of the DO and quickly cover with the lid.
- Place the Dutch Oven back on the center rack and lower the temperature to 450 degrees. Bake at 450 for 40 minutes.
- After 40 minutes lower the oven temperature to 425 degrees and then remove the lid from the Dutch Oven. Bake for an additional 40 minutes, uncovered, at 425 degrees.
- When the bread is done, it should have an internal temperature of at least 210 degrees and the bottom of the bread should sound hollow when you knock on it. Cool completely on a wire rack before slicing and serving.
(printer-friendly version below)
Pro Tips for Making 4 Ingredient Sourdough Bread
- Follow the recipe. Please make this recipe as written before trying to change anything.
- Use a digital kitchen scale. It makes all the difference when baking gluten-free bread.
- Use a mature sourdough starter. For best results, your sourdough starter should be at least 2 weeks old. For even better results, your starter should be at least a month.
- Your bread will rise higher and the sour flavor will intensify as your starter ages.
- Proof your dough in a medium-sized bowl. A large bowl with a wide bottom will make your dough “rise” by spreading out in the bottom of the bowl vs. rising higher.
- Make sure your bread bakes all the way through. Your bread is done when it’s at least 210 degrees F.
- Bake your bread to 15% loss in weight. Somebody gave me this tip when I was trying to reduce the gumminess and with this baking method, I’ve been able to achieve this. I weigh my loaf before baking (after dusting with flour) and before putting in the Dutch Oven so I know how much it should weigh when it’s done.
- Cool the bread completely before slicing. I can’t stress this enough. For the best texture and to reduce gumminess, your bread needs to cool all the way through the center. You should let it cool at least 6 hours before slicing and overnight is best.
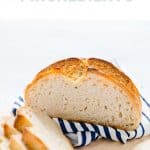
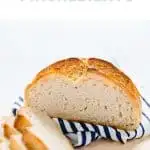
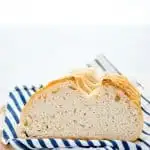
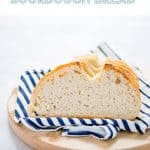
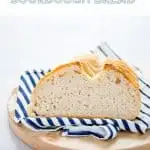
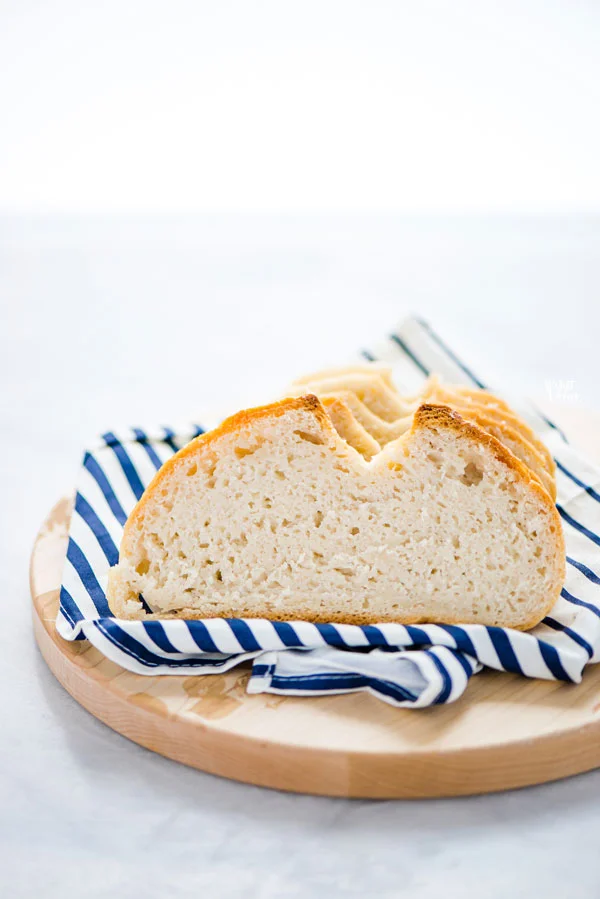
- Due to the nature of the 1:1 flour used in this recipe, the resulting bread is slightly dense with a tighter crumb. It tends to be on the gummy side at room temperature and will be sticky to the touch. It’s very similar in texture to the leading Gluten-Free Sourdough Bread on the market, Bread Srsly.
- For the best flavor and texture, please toast this bread before eating 🙂

Other Sourdough Recipe Ideas To Try
- Gluten Free Sourdough Banana Bread
- Gluten Free Sourdough Cornbread
- Gluten Free Sourdough Chocolate Chip Cookies
- Gluten Free Sourdough Chocolate Cake
- Gluten Free Pumpkin Spice Bread using Sourdough discard
Be sure to follow me on Instagram and hashtag #whattheforkfoodblog or tag @whattheforkfoodblog – I love seeing what you make!
If you love this 4-Ingredient Gluten Free Sourdough Bread Recipe, be sure to follow me on social media so you never miss a post:
| Facebook | Twitter | Pinterest | Instagram | Youtube | Newsletter |


4-Ingredient Gluten Free Sourdough Bread Recipe
Ingredients
- 200 grams un-fed Gluten-Free Sourdough Starter see notes
- 420 grams Bob’s Red Mill 1:1 Gluten-Free Baking Flour see note 10
- 300 grams bottled water cold or room temperature
- 12 grams fine sea salt
Instructions
Day 1 (Around 12 pm)
- Make the dough: Add the un-fed starter, gluten-free flour, water, and salt to the bowl of a stand mixer. Use the dough hook to mix until all ingredients are combined, the dough comes together, and there isn’t any loose flour left.
- Bulk Fermentation: Gently form the dough into a ball and place in a lightly oiled and floured medium glass bowl. Loosely cover and leave in a draft-free place for 6-10 hours. 6 hours if your house is on the warm side and up to 10 hours if your house is cooler. I generally let mine rise for about 8 hours. At this point, you don’t want your dough to double in size.
- 2nd Proof/Retard (around 8pm): After the first rise, transfer the bowl to the refrigerator to finish proofing in the refrigerator for 12 hours. You can keep the dough in the same bowl or you can gently reshape it and place it in a floured Banneton Basket.
Day 2 (Around 8 am)
- Place your Dutch Oven on the center rack and preheat the oven to 500 degrees. Let the Dutch Oven preheat at 500 degrees for at least 30 minutes.
- When the Dutch Oven has preheated, remove from the dough from the refrigerator. Turn the dough out onto a piece of lightly floured parchment paper.
- With generously floured hands, gently re-shape to a tighter ball and use the flour to smooth the dough. The dough should be completely coated with a layer of flour. (Skip this if you proofed in a Banneton Basket)
- Use a sharp knife or bread lame to slash the bread, you want the slash to be at least 1-inch deep. You can make it decorative or keep it simple to start and just do an X in the middle.
- Remove the Dutch Oven from the preheated oven. Use the corners of the parchment paper to lift the dough and carefully place it in the Dutch Oven so you don’t burn yourself. Place 2 large ice cubes in the Dutch Oven between the parchment paper and sides of the DO and quickly cover with the lid.
- Place the Dutch Oven back on the center rack and lower the temperature to 450 degrees. Bake at 450 for 40 minutes.
- After 40 minutes lower the oven temperature to 425 degrees and then remove the lid from the Dutch Oven. Bake for an additional 40 minutes, uncovered, at 425 degrees.
- When the bread is done, it should have an internal temperature of at least 210 degrees and the bottom of the bread should sound hollow when you knock on it. Cool completely on a wire rack before slicing and serving.
Notes
- The sourdough starter used and tested in this recipe is made with Bob’s Red Mill 1:1 Gluten-Free Baking Flour. It’s a 100% hydration starter, which means it’s made with equal parts flour and water.
- The flour blend I use contains xanthan gum. For best results use the flour listed in the recipe or another high-quality gluten-free flour blend that already contains xanthan gum.
- Tap water can be subbed as long as it hasn’t been chemically treated. Chlorine will kill the active cultures and wild yeast.
- This dough can be mixed by hand if you don’t have a stand mixer. I use a Danish Dough Whisk to mix it.
- The sourdough bread process is not the same as traditional sourdough bread made with wheat flour. There’s no stretching or folding of the dough during the bulk fermentation. With gluten-free dough, the bulk fermentation is just the first rise.
- I finish proofing the dough in the refrigerator, sometimes referred to as Retard. It slows down the rise and helps prevent over-proofing your dough.
- I use a 5.5 quart Dutch Oven to bake this bread. If you don’t have a Dutch Oven, you can use a cast-iron skillet and cover the bread with aluminum foil for the 1st half of the baking process. Be careful not to burn yourself when covering with foil.
- It’s important to cool the bread completely before slicing.
- This bread is best served toasted. Think toast for breakfast, garlic bread, etc.
- To make this bread with a flour blend that doesn’t contain xanthan gum, mix 15g whole Psyllium Husk with the water and let it sit until it gels. Then mix the ingredients and follow the directions as indicated.
Recommended Products


Nutrition Information
Disclaimers
As an Amazon Associate and member of other affiliate programs, I earn from qualifying purchases.
Nutrition Facts are estimated and aren’t always accurate. Please consult a doctor or nutritionist if you have special dietary needs.
Did you make this gluten free sourdough recipe? Leave a star rating and let me know in the comments! You can also leave a photo/comment on this pin for others to see.
Thank you for this recipe, I did alternate a bit, using buttermilk some honey, and some butter, I cook it in a Pullman loaf pan and the crust is chewable, when I did it in my cast-iron, I couldn’t get a knife through it. My question is to make it a larger loaf. Could I up the ingredients by 50%?
I have made this a few times now and I LOVE it. I keep the lid on the entire time and that keeps the crust from getting g too hard. For some reason I find myself not needing the second proof. Going to start experimenting with add ins this week I think. Love this recipe and definitely recommend following the starter recipe as well!
This is the easiest & best gluten free sourdough bread recipe that I have found! I appreciate the detail & times given. Super helpful! It always turns out so good.
Thank you, Ken!
Hello
This is my second attempt. The first, my bread came out hard. I salvaged it to make croutons. I had to add a lot more water. Today, I have some rising. This is way dryer than the first. I use a digital scale to measure my ingredients also. I basically had to tamp this down in my bowl. Please help. This is getting really expensive making all these mistakes. It’s rather disheartening.
the recipe was very easy to follow and uncomplicated which I really liked. My bread though did not rise and the crust was very hard. There is something that I am missing. not sure what. any advise is welcomed.
Im confused about the unneeded starter part ?
I’m brand new to GF sourdough and have made this super easy recipe 4x this month. I don’t consider myself a good baker, so I was surprised at how easy this was to make, and I’ve already learned my own adjustments to make for a softer crust. Thank you for making this recipe and for your GF starter recipe! It’s given me some much-needed GF baking confidence. My husband, who isn’t GF, even said this is some of the best sourdough bread he’s had, and he’s really enjoying all the discard pancakes.
Will psyllium husk replace the xanthum gum in a recipe? Is htat what makes it rise? Would I be better off using xanthum gum and how much per recipe? S.
Yes, psyllium husk would replace the xanthan gum. It doesn’t help it rise, but it acts as the “glue” that binds the grains/starches together to mimic the structure of wheat flour in baked goods.
Love this recipe but I’m still playing around with it! The crust could break a tooth after it cools… any suggestions/thoughts on what I’m doing wrong?
I would try baking it with the lid on the entire time except for the last few minutes.
I found Shay’s recipe after a few dismal results with others. This recipe is very easy and delivers consistent results. Tastes great! Even my husband who is not gf and hates gf bread loves it! The crust is beautiful and crusty. Best warm or toasted. Lasts for a week in a plastic bag on my counter.
Thank you, Karen!
I love the taste of this bread. When I make it in an iron Dutch oven the bottom crust is extremely thick (BTW the glass lid seems fine at these temps),so now I’m trying out loaf pans(that don’t fit in the Dutch oven) and putting 3/4 Cup of water on the bottom rack of the oven.
I make a slash through the entire loaf toward one side.
It seems promising, not sure yet.
Thanks for sharing, Susan!
If i’m using a cast iron dutch oven, is the cooking time different???
It should be the same because that’s what I use. Environment, oven, and altitude could effect baking time though.
In the bulk fermentation stage can it be left overnight?
This is so easy and so delicious! It has great sourdough flavor!
Thank you Amy!
Use Bob’s red mill baking flour blended for the starter and baked the bread using 14day old, it turned out very yummy. Thank you for the recipe! Can you make loaf and freeze it for later? How long is the storage?
Yes you can freeze it! I recommend slicing it before you freeze it.
I am extremely new to sourdough baking. I find that a lot of the recipes are measured in grams. How are they to be converted, cups, teas/table spoons, ounces? I calculated to cups an now I have a ton watery dough and wasted flour. I would love to make this but I am not a novice. I’m trying to figure out how to save the mixture I have without throwing it out.
Hi Erin, the ingredients for sourdough are almost always measured by grams for accuracy, and even then adjustments are often necessary based on your unique environment and starter. Without knowing the weight of the water and flour you used, since that determines the hydration percentage, I can’t give you recommendations to adjust what you’ve already made.
I am not a baker. My outer crust came out so hard. Is there something I could’ve done wrong? The taste was still amazing.
I used kings gluten free flour and it’s not staying together really well. I just put it in the fridge to proof. Can I add xantham gum tomorrow before I bake it?
great recipe–mine sometimes comes out doughy? Any ideas why??? The bread knife will have dough on it …..
This recipe produces a bread with a slightly gummy texture.
Can I bake this in a bread loaf pan? And if so, how does the temperatures work ?
I haven’t tried baking this in a loaf pan.
put it in a warm oven with steamy water, as well.
Is it okay if I left my dough out for bulk fermentation for about 13 hours? It did almost double in size.
This is my second time making this and the first time it turned out perfectly for my first loaf! Great and easy recipe
Yes, if that method works for you and your unique environment, I would stick with that!
My starter is currently in the fridge. How long before the first step should it be out for?
I would start feeding it regularly for a day or two until it becomes fully active before baking with it.
I love this recipe! I add some active yeast too. Also- I just skip the fridge step altogether and let rise on my counter in a glass bowl covered for 3-4 hours. Then I plop it on some floured parchment paper and bake!
Thanks for sharing, Emily!
Really enjoyed this recipe!! Have you tried to make a large loaf where I could double the recipe?? Have you added any inclusions to this recipe??
Thank you, Morgan! I have not tried doubling the recipe.
What do you mean by unfed starter? Or how long after the feed should you start this process?
You’re essentially using discard to make this recipe. I start the process when my starter is ready to be fed.
Can I use my rye sourdough starter with a gluten free flour to make a ‘ gluten free’ loaf ?
No you couldn’t. Rye contains gluten, therefore any loaf you make with a Rye starter would not be gluten free.
So tasty and easy!
Thanks, Tina!
Hello!
I’m excited to try this recipe! The starter I’m using is being fed a 1:1:1 ratio (50g each), so I’m not sure I’ll have enough, before I do this Saturday, should I double feed my starter or bulk feed it?
Hi there,
My house is 70° always because new baby. I did about a 8 1/2 hour bulk ferment but I’m wondering if this recipes needed a set of stretch and folds prior because the dough is not like sourdough. It breaks off in pieces and I’m not sure if that was supposed to change? Currently doing its cold retard. I’m sure it’ll taste great but the texture threw me off and I got confused that I couldn’t shape.
Gluten free bread does not need to be folded and shaped the way regular sourdough does. Hope that helps!
Can I have the starter recipe please?
Here the link to the gluten free starter: https://www.whattheforkfoodblog.com/2020/05/17/gluten-free-sourdough-bread-recipe/
I’m knew at the sourdough starter.
Can use tips
Hi Shay, Could I use king Arthur gluten free 1:1 or bread flour?
I have only tried this recipe with Bob’s Red Mill 1:1 and my Nightshade Free Flour Blend.
I love how easy this recipe is, and the bread tastes delicious and the crust is beautiful. The only thing I’m struggling with is a gummy, sticky inside, and it’s exactly the same every time. I read that that probably means it’s undercooked. I follow the instructions exactly, and it meets the temperature inside. It’s so sticky, I can’t get a knife through it. I’m just wondering if you have any tips or a suggestion for temp/time changes?
We love this recipe! Even used cinnamon before baking. Have you ever doubled the recipe for 2 loaves? Would love to try.
Thank you Angel! I have not doubled this recipe.
Okay. What did I do wrong? I have a powder sitting in my mixing bowl. 200 g of bobs 1-1, with 420 g additional bobs 1-1, 300 g bottled water, and 12 g sea salt.
200g is the amount of starter (made of 100g water and 100g flour), it sounds like you added 620g of gluten free flour.
Replying to my earlier comment and your response- if I skip the second rise, should I then aim to start baking whenever I think the dough has expanded to it’s maximum size? Probably a dumb question, but I’m not an experienced baker- this loaf is pretty much all I do. :). Thanks!
Yes, right at peak or just before 🙂
What are measurements in cups and so forth?
hi,
have you made this into a loaf? i don’t have a dutch oven. thanks!
I have not but I have made it in a cast iron skillet. It’s in Note 7 on the recipe card 🙂
This is the easiest recipe for GF sourdough that I’ve been able to find. I get consistent results and it’s very easy to modify if you’d like fancier bread (the loaf I am currently proofing contains ground flax seed and oregano). I have an autoimmune disorder that saps my energy, and had I not found this recipe I would not have sourdough bread. I do have to add more liquid and bake the boule about 40 minutes longer due to living at 8000′, and I use a meat thermometer to make sure it’s at 190F. Shay,thank you so, so much!
You’re welcome, Bekah! I’m so happy you can use this recipe and enjoy sourdough again!
Can I use a brown rice sour dough starter for this recipe or should I make a different starter using Bob’s red mill 1 to 1 ?
Yes, you can use brown rice flour for the starter.
I made this today! The dough rose beautifully yesterday and then I put it in a banneton on the fridge. Today, it was small and no rise at all. It baked so pretty, very hard crust. The inside was to tight, my jaw hurts after eating a slice. But the flavor was perfect! I am going to try again and then bake after the first rise.
I’d love to hear how it comes out when baking after the first rise!
My family and I LOVE this recipe, and I’ve made maybe a dozen or so loaves. Thank you! Question- my dough tends to get very big during the first rise- then shrinks down a bit during the proofing in the fridge- should I adjust something? We love the bread, but if there’s a way to make it even better….thanks!!
Thanks so much for sharing, Stephen! You can try skipping the second proof and see where that brings you! It sounds like you’ve got a great environment for sourdough.
Could you share your gluten-free sourdough starter?
Here’s the link to the starter: https://www.whattheforkfoodblog.com/2020/05/10/how-to-make-sourdough-starter-gluten-free/
Loved loved loved this bread, I have already made it 2x and used the discard to make crackers, pita, pancakes and were all delicious. Curious if you think I can add jalapeños and cheese to this recipe to make it cheesy jalapeño gf sourdough? Or would that mess up the recipe?
Thank you, Luz! I haven’t tried this bread with mix-ins.
Can you please talk about what the texture of the dough should be like?
Have you ever added any inclusions in this recipe?
I have not, I wanted to keep this recipe as simple and basic as possible. Once you’re comfortable, feel free to start experimenting!
Can you tell me specifics on how to make the sourdough starter. I am a newbie and would very much like to start baking my own bread.
You can follow my guide to make a gluten free sourdough starter here: https://www.whattheforkfoodblog.com/2020/05/10/how-to-make-sourdough-starter-gluten-free/
This was my first gluten free baking attempt. With all my normal sourdough fails I was nervous to make it. It turned out pretty good though. It looks shorter and wider than your picture and darker. It’s also quite sticky. Still tasty though. Guessing a toasted piece will be perfect. How should I adjust? I am in Texas. Thinking maybe a little lower temp for longer?
Hi! Can you please post the ingredient portions in cups or tablespoons? I have no clue how to figure out what g portions to use. I used an online calculator but my dough seems very wet so I’m sure I did it wrong. Thanks!
I tried the gf sourdough starter and bread. The bread is nicely shaped and browned but it is a bit gummy inside. It saws completely cooled before I sliced it. Tips?
Due to the nature of this bread, it will have a slightly gummy feel when done which is why I suggest toasting it before eating 🙂
i made this recipe twice. one in a normal 2lb loaf tin inside a large dutch oven.
the second one, this morning, in a loaf tin again but without the dutch oven. instead the oven was set to a fan with steam setting, bread placed in middle shelf on a full tray with another full tray upsidedown just above. a second tin half full of ice cretes the steam.
both were very good results using Doves Farm Freee bread flour.
my sourdough starter is only 4 weeks old so it needs a lot more maturing to further improve the taste
Thanks for sharing David!
Baking time of 80 mins?! I stopped it at 60 mins and it was hard as a rock! Inedible!
I followed the directions this recipe tasted great but I was disappointed the loaf was the size of my hand. Will try again tripling the ingredients
Love the ease of this recipe! However, utilizing the iPhone version of this recipe is particularly annoying with all of the ads. The site would constantly have pop ups and move and leave the spot that I was on in the middle of whatever phase I was in in the preparation. Not sure if there is anything you can do about that, but, as a user, it was frustrating.
This recipe was my first and second attempt at [gluten-free] sourdough. For the first loaf, I used Cup 4 Cup and made the dough exactly as directed. It was much wetter than expected, but what do I know? But by the time my 12 hours in the fridge was up and it was time to bake, I was exhausted. Life happens, so I gave myself grace and my dough stayed in the fridge for another 24 hours. After the 36 hours, I baked the dough anyway, because GF flour is expensive and like heck was I letting it go to waste. I baked it exactly as directed, and it turned out AMAZING. The crust was perfect, the dough was sour, and I was in heaven! Three days ago, I decided to try it again. I used Better Batter flour and active starter (fed 8 hours prior). Due to scheduling and energy levels, I left the dough in the fridge for 36 hours again. The bread is delicious. This recipe is so easy, and being able to make the dough and bake on different days is so handy if you are busy or your energy levels fluctuate. I can make the dough on Sunday night and bake on Tuesday night. Thank you for this recipe!
In case it matters – My [mature] Cultures For Health GF starter has been eating some discontinued Simple Truth (Kroger) GF all-purpose blend that I bought on closeout for cheap. I feed it 1:1:1. I live outside Denver at 4900ft.
If I use active starter, do I have to let it rest as long as this recipe calls for?
Hi Jes, I have not tested this recipe other than how it’s written so I can’t give you an estimate on time.
This is the 2nd GF sourdough bread recipe I have tried- and this was fantastic! It is simple & tastes wonderful. Even my husband who is not GF gave it a stamp of approval.
Thank you Morgan!
My first attempt at sourdough. Followed your gluten-free starter recipe and made a loaf of bread on day 14; baked on day 15. Satisfied with my first loaf. Much better crust and flavor than store-bought gluten-free bread. However I had to make a couple adjustments.
1. I live in a high-altitude,dry climate. My starter seemed a little dry–consistency of biscuit dough. I added 77g of water instead of 75g.
2. By day 14 I had only 170g of starter. Fortunately I had saved 2 days worth of mature discard (for making crackers) so added 30g of this to my bread dough.
3. I have neither a Dutch oven nor a cast iron skillet. So I proofed and baked in a round silicone bowl and combined your instructions with what I learned baking 5-minute/day artisan bread. I preheated the oven to 450° with my broiling pan on bottom rack. When oven was ready I poured 2 cups of water in broiling pan. I set my loaf (in the silicone bowl on a cookie sheet) on center rack. Inserted digital thermometer. Baked 40 minutes. After 40 minutes lowered temperature to 425° and covered loaf lightly with aluminum foil because crust was getting dark brown. Baked another 40 minutes. At this point my bread would not heat more than 201°. After baking another 10 minutes, temperature still didn’t rise, so I removed it from the oven. Sounded hollow when cool enough to handle. Now I just need to figure out how to make more than one loaf at a time.
Absolutely delicious and very simple to make ! Thank you !
Thanks, Lisa!
Can this recipe be doubled for a larger loaf?
I haven’t tried doubling this recipe.
I have made this twice and the crust comes out to hard. Inside was great! I use a floured batard and a gas stove and live in Boulder county Colorado. Does that change the directions?
Excited to try this! Been working on a gluten free starter for my mom and I think it’s almost ready! May I ask why it calls for unfed starter instead of active? Just curious! 😊
That’s just how I developed the recipe to make it a bit easier.
I don’t ever have 200 grams of sourdough starter to make a bread because I follow the direction everyday for 3 weeks and end up with 75 grams of starter after feeding and leaving overnight. What am I doing wrong
Can I use my regular sourdough starter (not gluten free) with this recipe? I want to cut down on the amount of gluten in sourdough bread for my daughter without making a whole new starter. The rest of the family can have gluten. She has a gluten sensitivity.
I am excited! The bread has come out exactly as it should at 211 degrees and hollow sound… but I was worried about cooking it the second 40 minutes so only did ten. Waiting for it to cool before rating the recipe!
This bread made me cry tears of joy. I’ve been gluten free for ten years, and it’s the best bread I’ve had. I love that this recipe has only 3 ingredients-flour, water, salt. Mine didn’t rise a ton, but perfect crust, texture, nice air bubbles on the inside. I’m so grateful. Will be making this again and again.
Thank you Sheri!
My first gluten-free sourdough. Turned out great – even better than my glutenous loaves! I don’t feel like my bread rose very much during the bulk ferment/2nd proof, but it turned out well anyway. Wonderful with some olive oil and vinegar. 🙂
This was my first time making any kind of bread! Super easy to follow for a beginner. So excited to get better. My bread never reached 210 degrees, even though I baked it about 30 extra minutes, I finally just took it out because it looked my crust was burning. The crust was so hard it was almost impossible to cut through, and the inside was very very gummy. What could I change for next time?
This came out delicious! After many attempts at gf sourdough bread, this one was the BEST. I don’t know if it’s because I used a different gf flour than the discard or if I used a pampered chef stoneware pie plate with a metal cake tin to cover it with a baking sheet with water on the bottom shelf or what. I will definitely be keeping this recipe. It wasn’t gummy at all and had the air pockets when I cut into it. Also used olive oil in the pie plate.
Thanks for the great feedback Janie! It sounds like your setup worked wonderfully!
Recipe worked great, taste is amazing, but the crust was so hard I could barely cut it. Any advice would be appreciated!
The recipe was really good, the bread is a bit chewy though.
Followed the gf starter recipe and then the bread recipe! This was the first time I have ever baked bread period and it turned out sooo good! and I feel like now that I have done it once, it will only get easier!
Thank you!
Question, what is the best way to store this bread?
Hello, I just made my dough and it didn’t come together in a ball with the dough hook. How long should I let it mix? It was well combined… I add a bit more flour and that didn’t change it; should it form a ball or as long and it’s well incorporated it’s ok? Thank you in advance, new to Gluten Free and making sour dough.
I loved the simple recipe and my first loaf came out great. Just a little dense and gummy in the middle. Any tips for my second loaf?
Due to the nature of this recipe, there will be a slight stickiness which is why it’s best eaten as toast.
Great & easy recipe! It is hard to cut when you get the crust nice and crispy golden. I did have a trouble with it being a little gummy inside but problem solved with toasting it!! Yum! And best boule I’ve managed to make too!
Been GF for 15 years now and bread has always been a challenge without having to use 10+ ingredients! This year I’m challenging myself to start making GF breads and this recipe was perfect!! My starter is still very “immature” but still gave a wonderful result. I did use GF Jules all purpose flour as that’s my go to flour. Followed recipe to a T with no problems!! Can’t wait to perfect this!!
How much psyllium husk powder would you use instead of whole psyllium husk?
Why does this need to be made with unfed starter?
I made this and it tastes great. I didn’t follow 100% though Bc I don’t have a kitchen scale. My dough was very dry, which panicked me so I added water after the 2nd proofing in hopes it would be rescued and it’s pretty good.
Just curious about the unfed part, NC I thought you were supposed to feed before cooking with it most times.
It’s basically starter that’s ready to be fed but used in the bread instead. You’re essentially feeding it when you make the dough, which is why it rests for awhile.
Can I make dinner rolls with this?
I haven’t tried it but if you do let me know!
Made this, or at least a close facsimile. I made this with psyllium husk AND Xanthan gum. I had a long feed time with my starter and added honey, but turning this into rolls worked like a charm.
Ive tried many GF Sourdough bread recipes and this one has given the best results! (I used the diy mock better batter flour blend but substituted the xanthan gum in it for glucomannan)I did need to cook it an extra 35 minutes in order to get an internal temp of 210. Is this why my crust was super hard? I like a hard crust but this was really hard to cut. Also it was a lot darker than your loaf. Still Delicious!
I made this yesterday and it is PERFECT. How can I turn this into rolls? Please help me out Sis!
This was AMAZING! I accidentally left it on the counter for like 12 hours during the first fermentation and was worried it would be ruined (I’m new to this) but it turned out incredible. I was able to find a 25lb bag of the Red Mill GF 1:1 flour for $50 at Gordon Food Service so this was much cheaper than the flour I was using before. I’ve been sharing your recipe all over a GF sourdough Facebook group because this is the best I’ve ever found! Thank you!!!
Thank you!
I have made this countless times and it never forms into a ball. It’s just like thick pancake batter. Helllppppp.
I’ve made this 4 times and it has never failed me. Super delicious, moist and easy to make. Thank you for such a delicious gluten free recipe.
Thanks so much Sophie!
Is the dough supposed to rise during the 2nd Proof?
This dough doesn’t rise a ton during proofing. It does more of it’s rising during baking and has a nice oven spring.
Excited to continue making this. Just had my first batch. Tastes great but didn’t rise much. The bread dough was very wet and loose when mixing and attempting to form. Should I have added more flour? I think my starter was also very liquidy so not sure if that threw things off.
Hi Ben, it does sound like your dough was a little too wet. If you used a starter made with a different gluten free flour, it will have a different consistency.
Followed the starter recipe and worked great! However I think I might have messed something up with this recipe as it didn’t rise much lol! It’s like a hard brick bread. Still tastes great but hoping for some insight on how big it is supposed to get!
Hi Kayla, this doesn’t produce a large loaf. It’s slightly larger than a traditional boule that would be used for a soup bowl. It doesn’t rise a ton during the proofing stage and will rise when baking.
Regarding the GF sourdough bread recipe,If the schedule for feeding the starter is adding 75 g of flour and 75 g of water to 25 g of starter continuously, how do you reach the 200 g of starter needed for the recipe? I am on day 13 and will be baking soon but do not understand how to obtain the quantity needed.
The day before baking, I feed my starter 100g water and 100g flour. That gives me 200g for baking and 25 grams leftover to feed again.
Just what I’ve been missing being Gluten-free
Glad you can enjoy it Karrie!
I did this recipe the exact same way except I used a pyrex dish with a lid as I don’t have a DO.
Turned out peeeerfect. You couldn’t tell it’s GF! Unfortunately it doesn’t taste as good the next day.
Would this recipe work for bread rolls ?
Thanks so much Noemi! And yes, I like to slice it and freeze it once it’s cut into 🙂
I haven’t tried this recipe as rolls.
Dear Shay
What is the % mix of xanthan gum in the flour?
I can’t find flour ready mixed with xanthan gum in KSA.
I honestly don’t know the percentage as it’s not disclosed on the packaging. You can use a flour blend without the xanthan gum and follow note 10 in the recipe card to use whole Psyllium Husk as the binder.
Hi Shay,
Thank you for making it so simple. I’m an expat in KSA and a small loaf of sourdough bread is very expensive to purchase, $10-12 in specialty bakeries.
Could I use coconut flour as a sourdough starter?
You’re welcome! I wouldn’t use coconut flour for a starter. If you’re looking for a single flour to use instead of a blend, I would recommend using brown rice flour or sorghum flour.
Hello.
I was excited to use this recipe until the following:
Term “un-fed” starter is used in the first step. I have no idea what that means.
There is no recipe to make the starter.
How much starter is needed?
Humph…
Hi Karen, un-fed starter is essentially discard from the starter. This is the recipe for the starter, it’s linked to in the post: https://www.whattheforkfoodblog.com/2020/05/10/how-to-make-sourdough-starter-gluten-free/
I have a cookware that looks like a Dutch oven but it’s made of ceramic with a glass lid. Do you think this material is comparable to the Dutch oven? Would you feel safe using it if it was all you had?
Secondly, if I had a bread maker, could I safely bake it in the bread maker??
I really want to try this. Please answer asap
I haven’t tried this in a bread maker and I don’t think glass can bake at such a high temperature. I’d be worried that it would shatter.
Can I make this recipe using your Nightshade Free Gluten Free Flour to make the starter and using your Nightshade Free Gluten Free Flour to make this sourdough bread?
Yes you can! I use whole Psyllium Husk as the binder with this flour blend. Be sure to read Note 10 in the recipe card!
Soooo good and great texture!
This bread turned out great for my first attempt! It did have a slightly different taste than my regular sour dough but it surely tasted like sour dough! The dough was too wet after initially mixing the ingredients so I added a little more flour and about two tablespoons of starter until I felt it was the proper consistency. I felt somewhat confident about doing this because of my experience making regular sourdough bread. I did everything else exactly according to the recipe and it ended up looking exactly like the photos! The crust was nice and crunchy while the inside was soft and chewy. I’d agree with some of the other reviews that described it as doughy/gummy. I will definitely work on improving the texture next time. Overall, I was very satisfied with the results and my gluten free daughter in law liked it as well!
I made this for a friend of mine and did it the same way as I make my normal sourdough breads ,I did twice proofs it last time overnight in fridge and baked it in a breadtin with a tin on top for the first 20 min
I am happily surprised about the texture
Thanks for the recipe
I’ve been playing around with this recipe for the last week or so and it’s fantastic! Super easy. The biggest problem I’m running into is that my loaves are not rising as high as yours in the photo. I read in your blog that if I use a bowl that’s too big, that can affect the rise (which I’ve done, but I’ve also done it in a smaller bowl as well). I’m wondering if it’s my Dutch oven? I also use a 5.5 qt like you, but it’s oval shaped…any suggestions? Is there anything else I could add to my dough to help it rise better? I want to be able to have slices big enough to use as say, sandwich bread.
I have made this twice now and I am amazed how well it turns out. Have been GF for 15 years and have not had sourdough bread since. Great recipe will be making many times more!
I made this recipe and was really hoping to have great results. The crust was really hard and the bottom crust almost impossible to cut. The crumb was wet and dense. I used King Arthur flour for my starter and the bread. I am wondering if my results were based on using a different flour than Bobs Red Mill since not all gf flours are created with the same ingredients and they all act differently when cooking. I am back on the hunt to find a new recipe.
Can you provide the ratios of 1:1 flour to water you used to make your sourdough starter? I’ve run into several sourdough gluten free bread recipes now, but no one includes the ratios to make the starter! Do you use same/similar ratios as a regular starter? Thank you!
Hi Rebekah, here’s the link for How to Make A Sourdough Starter with gluten free flour. It’s can also be found in this post in one of the first paragraphs.
What can I use in place of Dutch oven and also can you post amounts in English?
I have just begun the adventure that is sourdough. I have made 3 loafs so far. When my dough comes out of the fridge from the overnight proof it has a dried crust on the top and sides and is not formable. Generally I flip it over and put the soft, pretty side on the top when baking. The bottom becomes so hard it is nearly impossible to cut with a bread knife. Why would this crust be forming? Is my fridge too cold? Is the dough too dry? Should I try covering the bowl with plastic wrap instead of a tea towel?
It sounds like your dough is a little on the dry side.
The gf flour I have has guar gum instead of xanthum gum, will that work? Should I add xanthum gum as well?
It should be similar but I haven’t personally tested with guar gum.
I followed this recipe to the letter. Mine, however, came out gummy on the inside and brick hard on the outside. It was beautiful but very hard to eat. I dried it out in the toaster, but that just makes it chewy and the crust almost inedible. I have been trying to figure out what happened, and the only thing I can find is that it might be because I use a gas stove. Do I need to cook it longer? And if so, how do I make the crust not be so hard? The taste is delicious. I just need to get the texture right.
Made this today and it is delicious! Used Bob’s 1 to 1. It is a little gummy but I see that is normal. Can’t wait to try it toasted. I experimented and took 2 chunks out of the dough and made 2 buns…hoping they will work for a burger.
Question, what is the best way to store it? Fridge, counter?
Thanks for a fabulous, and extremely simple, recipe.
The best way to store it is pre-sliced and frozen.
What if I want to use a Pullman loaf pan instead of a Dutch oven? Do I need to change anything?
Sorry I haven’t tried this in anything other than the Dutch Oven and a cast iron skillet.
This is great! I can hardly tell the difference between this and regular bread. It is a little heavier/dense but the flavor is awesome. The outside seems to be incredibly hard and crunchy so any tips on that would be appreciated but I will make it again!!
I love this bread. It’s so crusty and good. I make the bread flatter and wider almost like a flattened football. I score it 3 times the long way and 4 times the wide way. Then we eat the bread while still warm just breaking off the pieces. It’s like having a dozen crusty rolls, perfect for soup or stew or just eating with butter. I’d share a picture but don’t see how to do that. Thanks for the fantastic recipe.
You’re welcome, Mel!
Answered my own question 🙂 After doing a bit of research, I now understand that xanthan gum is a substitute for arrowroot – and as the Nightshade Free Flour Mix already has arrowroot starch in it – I guess it wouldn’t need xanthan gum as well.
Have you tried making this bread with no phsylium husk or xantham gum.
I have not.
I was so excited about this recipe and followed everything to a T, starting with the paired homemade starter and everything! I all looked and smelled sooo good, but still came out doughy! I couldn’t get the center to reach 210 without the outside getting overcooked. Any suggestions? Lower temp for longer maybe? I’m not the best at baking so this is new for me!
I used a digital scale and carefully measured all ingredients. I tested the bread by inserting a temperature guage. It looked like the picture, was hollow when tapped, but much too gummy to eat.
Curious if anyone had sticky, slack dough on initial mix and 1st bulk fermentation? I weighed all my ingredients, so I’m not sure if it’s going to work… eek! Hoping it will turn out.
I’m curious about why you go directly from fridge to bake…it seems like most recipes come to room temp or rest at room temp before the bake, after retard.
I had issues with forming mine out of fridge and am nervous I worked it too much forming it, but here is hoping….
Finally made this and it’s delicious. Such a fun and yummy recipe thanks!
You’re welcome!
To bake this uncovered using a Lodge Cast Iron pan. How long should I bake it please?
I have to tell you that now I’ll be gaining a lot of weight!
This bread is PERFECT! The perfect flavor and texture!
Only problem is, it tastes so much better warm with butter! I will highly reocommend this bread! I wish I could send a photo.
Yes! That’s why I recommend toasting it, it’s my favorite way to eat it 🙂
Xanthum gum has been linked to numerous digestive upsets. Can you recommend a flour without xanthum gum?
You can use this flour blend: https://www.whattheforkfoodblog.com/2016/01/14/nightshade-free-gluten-free-flour-mix/
There are notes on the post on how much Psyllium Husk to use when you use a flour blend without xanthan gum.
Hi! I’ve made this recipe 3 times so far and we really enjoy this bread. The first time I made it, the bread stayed in a nice boule shape. The other 2 times, it flattened a bit as it was cooling. What am I doing wrong??
If I were to buy starter from Thrive market or somewhere else would the recipe still work?
If you buy a starter, it should have directions included with it.
Wow! The crust on this loaf was so crunchy and utterly delicious. My husband is gluten intollerant, but can handle occasional gluten in very small amounts. I took a chance and used my regular (gluten) starter with King Arthur Cup 4 Cup GF flour. We cut into it while still a bit warm- could not resist- and slathered it in butter. What a treat! Fabulous result, not gummy, loads of flavor. Thank you!
Hey! Thanks for the recipe. I have a question about the amount of starter I’m to use when I start the bread. I think I read in the comments that’s it’s the discard amount of that days feeding. Could you confirm that for me? Much appreciated. Be well and happy baking.
Yes. I feed my starter 100g gluten free flour and 100g water the day before making this loaf 🙂
Curious about the glass bowl thing. I’ve never had a problem with sourdough in a metal bowl or bread pan
Hi! Trying this recipe out and so excited. You have to bake it covered for 40 minutes and then uncovered for another 40 minutes. Is this correct? I’ve made traditional sourdough for many years and this seems like a lot of time for a bread but it’s my first go with a GF one.
Yes that’s correct for this recipe.
I’m a little confused about this recipe. 200 grams of gluten feee sourdough starter I’m reading that as the packet of sourdough starter I just purchased one packet is 5.4 grams I need more than a packet? Or are you asking for 620 grams of the Bob Red Mill 1:1 gluten free baking flour?
It sounds like the packet you have is just a dried starter? If so, you’ll have to follow the directions it came with in order to make it a mature starter before baking.
I love the engineering science behind this recipe for bread. Thank you for clear eplanations. I suggest you move the comment about “best eaten toasted” closer to the front. This bread, with anchovy butter and poached eggs is what I’m having for my birthday in a few weeks. Thanks again!!
I just found this sourdough bread recipe. Reading the comments answered my question about using the nightshade free flour. But you suggest adding 15g psyllium husk to the water for a gel. Could you suggest an alternative? Psyllium is not something I can use. Thanks
I have not tested this with anything other than xanthan gum and psyllium husk.
Is this bread only worth eating toasted?? I really want to try this recipe but want to be able to eat I toasted as well.
It is probably best toasted, yes
curious about why there’s no kneading. that’s my favorite part of baking bread!
@Mona Bernhardt, No gluten to encourage by kneading 😊
Gluten Free Bread doesn’t have to be kneaded the way traditional bread made with wheat flour does.
Have made this several times… simple and love using different types of flour.. Weighing is great…
Yes weighing is the most accurate way to go!
If anyone in Australia is following this recipe, a word of advice: do NOT use White Wings All-Purpose Gluten Free flour. The result is a sticky, overly wet dough that does not hold its shape at all and is more like cake mixture. And I measured all the ingredients out by weight and followed the recipe instructions very closely. Thankfully, I have managed to find the Bob Mills 1:1 GF flour online through an Australian retailer, so once that arrives in the post, I will try this recipe again!
I did follow the recipe exactly except I used a local GF flour blend with gums. It turned out very well! It was also my very first sourdough loaf! So thank you very much for not overcomplicating things!
You’re welcome!
Thank you for sharing this recipe! I’ve made it a few times and the taste is always good.
The bottom of the bread always turns out so tough. It’s difficult to cut through. Is that an expected outcome?
I’m wondering what would happen if I skipped the dutch oven preheat. Did you test that in one of your trials?
I’m so glad you love it! I haven’t skipped the preheat for this loaf but I have for non-gluten free breads and it turned out well. You could also try baking with the lid on for longer and taking it off in the last 10 minutes to see if that helps.
Bread turned out fabulously but has far to much salt for our tastes. 12gms is a HUGE amount of salt. I’ll try 5gm next time. Bread was beautifully open and only got crusty when I removed the lid for 10mins. Used 360gm Bakels Gluten Free Baking (I’m in New Zealand) flour and 60gms almond meal. Beautiful texture.
Hi Marit, it’s about 2 teaspoons of fine sea salt. If you used table salt instead, it would be saltier and you’d have to adjust to taste.
Hi! Made this for the first time today and my kids DEVOURED it! They loved it! Can the recipe be doubled to make a larger loaf? Thanks so much! Wonderful recipe!
I haven’t doubled it but if you do, please let me know 🙂
Could you please include directions for making a GF sourdough starter?
@Shay,
I also would.like to know how to make the initial.starter and how to keep it fed, etc. How much to remove and keep each time. Answer to this perspns question did not include a link
Here’s the link for the Sourdough Starter Maintenance: https://www.whattheforkfoodblog.com/2023/01/11/sourdough-starter-maintenance/
You can find detailed instructions for the starter here:
Feed the starter 100g of gf flour and 100g water the day before you plan on baking so you have 200g 🙂
Can I cook this recipe in pampered chef stone ware pans?
I should think so as long as they’re oven-safe to the temperatures listed in the recipe.
This recipe is perfect, my gf son loves it. I follow your directions strictly and totally works!
Thank you Yvette!
In your experience, can let the 2nd proofing, (in the refrigerator) go longer than overnight, like a day or 2, or even longer before I bake it?
Could you please put cups in parentheses next to grams? Being new to baking and using this recipe as a starting point it would be nice to be able to use measurements that are in my kitchen and that I’m familiar with thxs
Hi Shay-
One more quick question-how often and how much do I feed my starter while I’m keeping it in the fridge? Thanks!
@Tami, I feed mine every 7-10 days in the refrigerator
Thanks you for this recipe… made my first 2 sourdough breads and they were so good
You’re welcome Maria! I’m so happy to hear that!
I could not make this due to recipe in grams and not cups or ounces On the internet conversion tables are confusing
Hi Jeanette, sourdough bread ingredients are almost always measured in grams, including the liquid because of baking percentages. If you’re planning on making sourdough, I highly suggest purchasing an inexpensive kitchen scale such as this one: https://amzn.to/3aNk57h
I’m sorry, I’m new to this… how do you make the starter??
No worries, Cyndee! You can get my Gluten Free Sourdough Starter guide here: https://www.whattheforkfoodblog.com/2020/05/10/how-to-make-sourdough-starter-gluten-free/
Hi There! Just made my first GF Sourdough loaf with the Bob’s 1:1 starter and LOVED it. I’ve got the rest of the starter in the fridge…how long do I need to let it sit out before feeding it to make another loaf? Do I just feed it just once? Thanks! Love this recipe!
I’m so glad you’re loving it!
It depends on how active your starter is and how long it’s been in the fridge. If it’s only been in the fridge for a day or 2, you can probably feed once or twice before starting another loaf. If it’s been in the fridge for a week, I’d feed it at least twice maybe 3 times before making a loaf just to get it nice and strong again.
Hi! I have some jarred hatch green chiles I want to add to it! Are there any suggestions you could make to having added ingredients like this?
I haven’t experimented with mix-ins for this loaf but I would drain the liquid from the jarred chiles before adding them to the dough. If you want to use the liquid, replace some of the water with it by weight. You can mix the chiles into the dough after mixing the starter/flour/water/salt before the bulk fermentation. Let me know how it comes out!
Hi! I’ve made this recipe twice now and both times the crush comes out super firm. Like so firm it’s difficult to slice. Any tips for troubleshooting this issue? Other than that, the flavor is PERFECT. Thanks!
You can try wrapping the loaf in a clean kitchen towel when it comes out of the oven. Wrapping it should produce a little condensation and make the crust a little moist. Let me know if that helps!
Just took my first loaf out of the oven – looks and smells amazing. But the parchment paper has stuck to the loaf – what is the best way to get if off the loaf and in the future prevent this from happening?
Hmm, I haven’t had that happen when baking with parchment paper. Did you accidentally use wax paper instead of parchment?
I dont hve a dutch oven Can I cook this in a regular oven?
You can bake it in a cast iron pqn and place a second pan half-filled with water underneath to help create the steam. You may have to loosely cover the loaf with foil to prevent burning.
I’ve never made bread before. How do you make “un-fed starter”? How do you make that?
Thank you!
The un-fed starter refers to sourdough starter discard. If you don’t have a sourdough starter, I suggest starting here: https://www.whattheforkfoodblog.com/2020/05/10/how-to-make-sourdough-starter-gluten-free/
I followed your directions to the T but my bread did not rise. I have read that you can add yeast to ensure enough rise. Do you know how much?
I don’t add yeast to this recipe. If your kitchen is cool, your bread may take longer to rise during the first rise. I suggest keeping it in a warm place and make sure that your starter is mature enough for baking.
My most successful GF sourdough attempt yet! I love the method you’ve provided – thank you so much. This is my go to from now on.
you’re welcome, glad you enjoyed!
I’ve tried many gluten free bread recipes. This one is the best I’ve made. I followed the recipe perfectly, using Bob’s Red Mill flour. That was amazing! Then I tried grain free flour blends. They worked very well too. The bread, toasted, is chewy and full of flavor, two bread qualities I thought couldn’t exist in gluten free bread. Thank you so much for posting this recipe.
I’m so glad you enjoyed it Cheryl! What was the grain free flour blend you used for your second loaf?
So easy and it turned out great!
I just made a second loaf and im having the same problem with both even after the internal temp gets to 220 degrees. It’s doughy. Please help! Thanks.
Hi Beverly! Thank you for making my sourdough bread recipe! As noted in the post and recipe, due to the nature of using a 1:1 flour for simplicity, this bread will have a sticky/gummy texture at room temperature. That’s why I’ve noted that this is best served as toast 🙂
Hi there! I’m hoping to add in kalamata olives, rosemary, and roasted garlic- at what point in the process would it be best to mix these in?
If you use the Bob’s Red Mill Gluten Free Baking Flour 1:1, then do you need another starter, or just this and the water and sea salt? I was confused by the instructions. Thanks!
This turned out beautifully and it tastes amazing! I’m so pleased with how it turned out, even though I got nervous about the length of time required to cook it and took it out 10 minutes early. It was a little gummy in the middle but still has a nice texture and tastes great. I think if I toasting it will make it better, but it’s even good untoasted with butter!
I will definitely cook it the entire time next time.
Thanks for the great feedback Emily!
I followed the directions to the t and ended up having to cook it 15 mins longer for the internal tempt o reach 210. I let it cool, sliced it and the inside is still kind of gummy. Not sure what I did wrong. Could I have made my dough ball to tight and small before putting it into the dutch oven? Should I make it a little later and wider next go round. I plan on making to loafs tomorrow, already have my dough sitting on the counter. Thanks so much!
I made this recipe this morning. I’ve been making a variation of this recipe for several years and everyone has always loved the flavor but my loaves were always dense and rather flat – Same ingredients with different proofing and cooking methods. This loaf turned out AMAZING with good rise!! The only regret is that it was a bit sticky inside, perhaps because I didn’t let it cool completely before slicing?
How long should I bake the loaf if I made it 50% of the recipe?
@Celeste Perez,
I think wish there was an answer for this. I’m doing half recipes too. I followed the recipe and turned my loaf to toast. I’ve tried less time and different temps and haven’t found the right combo yet. My best success was same 40 min with lid and 15 uncovered, but the crust was still too brown and thick… but the taste was good.
Oh shoot!! I forgot to put my bread in the fridge at night after proofing in the counter. I put it in the fridge first thing in AM but it sat on counter for 18!hours. Is it salvageable?
Mine proofed on the counter for 12 hours before going into the fridge and turned out perfectly well. The house temp got to about 87 (no AC).
Thanks for sharing Pamela!
Is it necessary to proof the dough in the fridge? What purpose does fridge-proofing serve on top of “regular” proofing?
A longer proof at a cooler temp will help develop the flavor of the sourdough.
Yay! This turned out beautifully. I can’t have eggs and have had such a difficult time finding egg free, gluten free bread recipes that work. I don’t have a Dutch oven so I used a Corningware 1.5 qt stoneware casserole dish covered with foil, waited until the oven was fully preheated to place it inside, and added a few minutes to the baking time for the first bake. It came out perfectly! 210 degrees, hollow sounding when tapping on the bottom, good texture, and a lovely sour taste. Thank you for this recipe!
Yay!!! I’ glad it worked out for you Jennifer!
why unfed starter??
Is there an issue to use bubbly (doubled) starter for the recipe?
I haven’t experimented with rising times for an active starter. You could use it, you’ll just have to proof for less time.
@Shay, thank very much for providing a recipe that’s so simple to follow – so many of the recipes out there are so complicated, especially for someone new to this. Could I just double check that the day before you bake you feed the starter and then use 200g of this starter to make your bread the next day? Or do you feed the starter the day before and keep the discard to use when you bake the following day? Sorry, just want to make sure I’m doing things correctly!
@Shay, great, thanks! I’ve fed the starter today so ready to bake tomorrow!
You’re very welcome! That’s exactly why I created this recipe, I wanted one that wasn’t intimidating for new bakers 🙂
And you’re right, the day before I bake, I feed my starter 100g flour and 100g water. Then the next day, I use that for the bread.
The starter used in this recipe is essentially this discard from the previous day’s feeding. The day before I bake, I feed my starter with 100g flour and 100g water.
Can this be made with your nightshade free gluten free flour?
Yes! Just add 15g whole psyllium husk to the water to form a gel and then mix the dough as indicated in the recipe 🙂
Ps. I pulled it at 201 degrees because it had been in there an extra 20 minutes.