


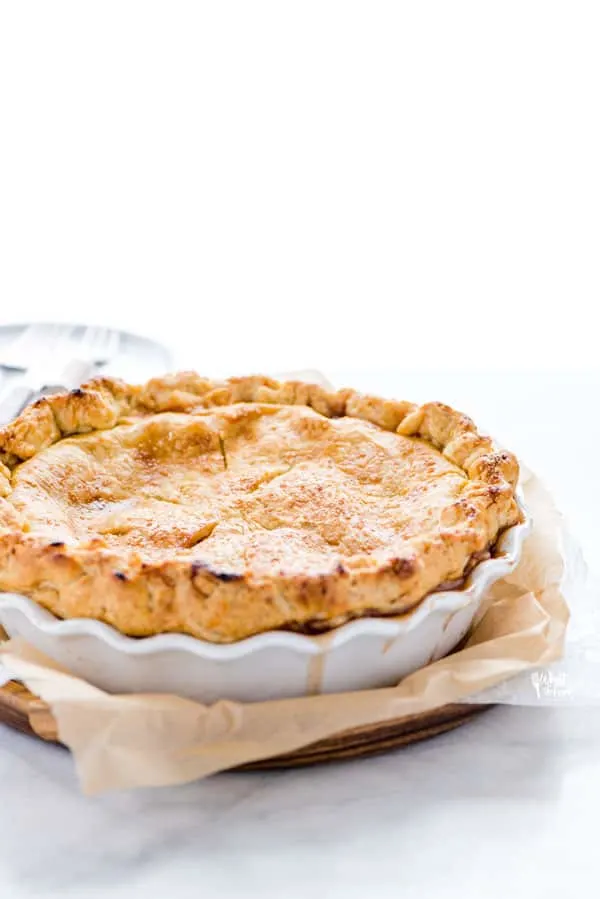
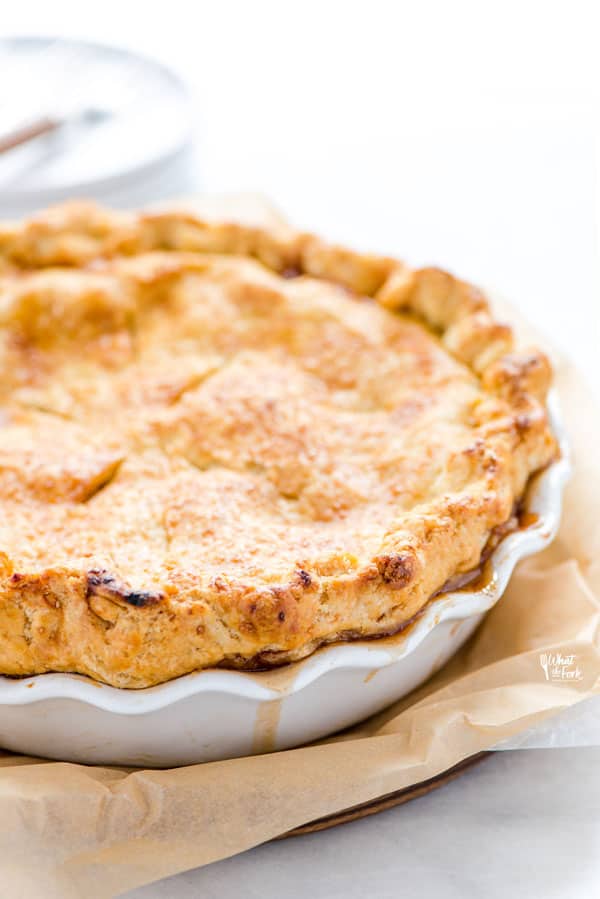
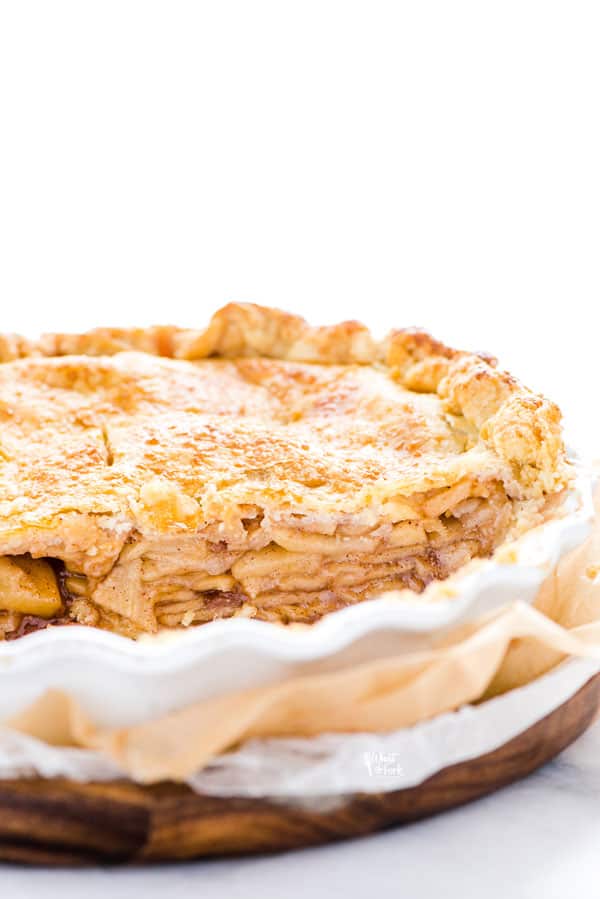
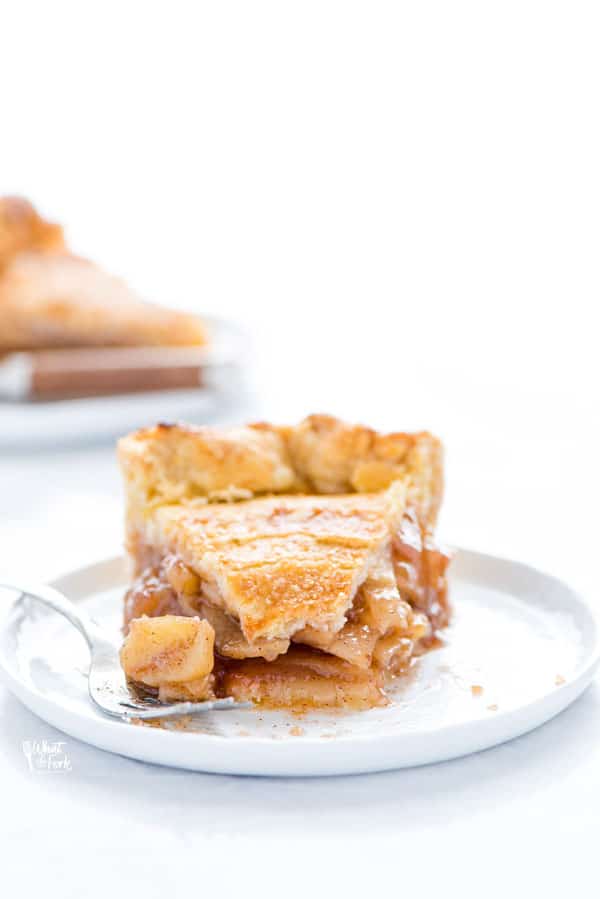
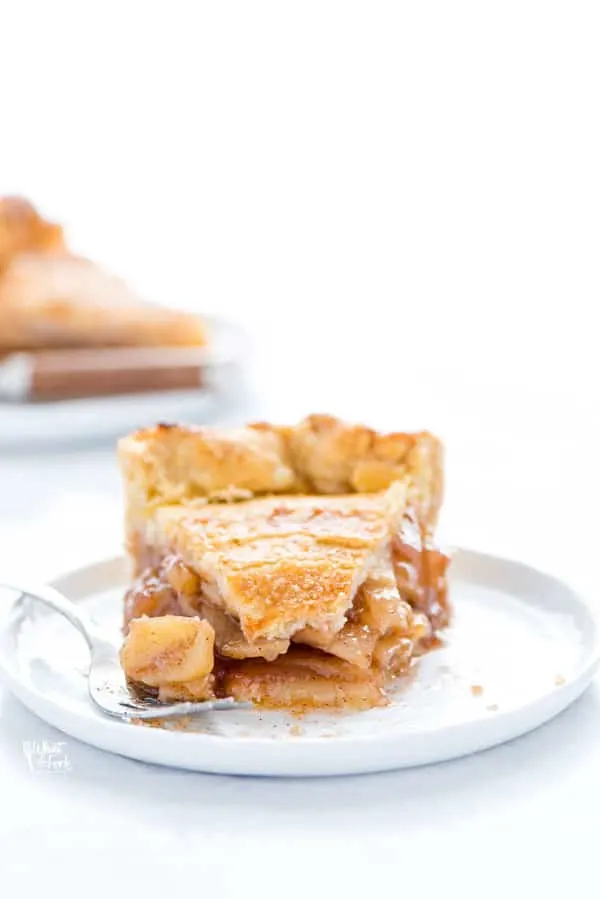
This Gluten Free Apple Pie recipe makes a delicious, homemade apple pie that taste just like grandma used to make. Sweet, spiced apples in a flaky gluten free pie crust is perfection.

This post contains affiliate links for products and ingredients I use and love. You can read my full disclosure here. Thank you for supporting What The Fork Food Blog so I can continue to provide you with free gluten free recipes ♥
Gluten Free Apple Pie
My mom makes the best apple pie. Every Thanksgiving, she was the pie lady. She would make her apple pie and fudge pecan pie and we’d all have a hard time choosing which dessert we’d want.
But really, we’d always have a little bit of both because then you get the best of both worlds!
Her apple pie though was always the favorite and her crust was always so perfectly flakey. Now, we make the apple pie with my gluten free pie crust recipe and it’s JUST AS GOOD as it’s ever been.
We’re not settling for a “good for gluten free” pie here. This is the real deal, best apple pie recipe that everyone at the table will be happy (thankful) to eat.
I don’t want to tell you how many apple pies I had to make to get it right because honestly, the answer is more than I’d care to admit 🙈
But it was 100% worth it!

Did you make this easy apple pie recipe? Leave a star rating and let me know in the comments! You can also leave a photo/comment on this pin for others to see.
Homemade Apple Pie Ingredients
- Apples – For this particular pie, I use a mix of Honeycrisp Apples (our favorite) and Golden Delicious Apples. I tried this with some tart apples (such as Granny Smith Apples) too but we prefer a sweeter apple pie. If you’d like to experiment with the apples you use, be sure to read my guide to the Best Apples For Baking. The most important thing is to use crisp apples and not soft apples. Soft apples will shrink up too much.
- By the way, according to my dad, a true New England Apple Pie must have Cortland apples (which are a tart apple).
- Spices – a mixture of nutmeg, ground cloves, and cinnamon give this apple pie filling amazing flavor.
- Sugar – I love the combination of granulated sugar and light brown sugar in the filling.
- Fresh Lemon Juice – use fresh-squeezed lemon juice, not concentrated lemon juice.
- Egg – the egg is for the egg wash to brush the crust to help it brown and to make the coarse sugar stick. If you need to keep this egg-free, just brush the crust with a bit of cream, buttermilk, or milk.
- Gluten Free Pie Crust– This is a combination of white rice and brown rice flour which makes for a successful gluten free flour blend for this recipe!

As an Amazon Associate I earn from qualifying purchases.
Equipment Needed to Make Easy Homemade Gluten Free Apple Pie
- Rolling Pin – I prefer using a French Rolling Pin because I feel like it gives me more control.
- Plastic Wrap – for rolling out the gluten free crust
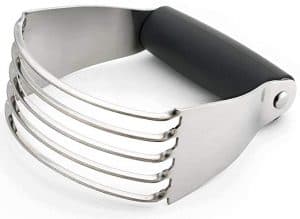
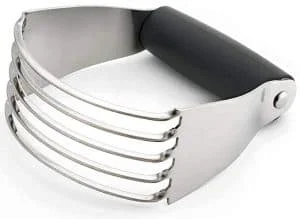
- Pastry Cutter – for cutting that butter into the flour for the crust.
- Vegetable Peeler
- Apple Corer – optional but a time saver!
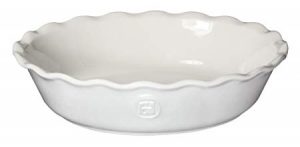
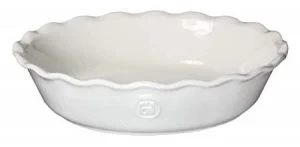
- 9-inch Pie Dish – For best results, use a Deep Pie Dish. The apple crisp might bubble over if you use a shallow pie pan.
- Pyrex Smart Essentials 4-qt Mixing Bowl
- Farberware Professional Pie Server (Stainless Steel)
- All-Clad Measuring Cups
- All Clad Measuring Spoons
- Pyrex 100 2 Cup 100th Anniversary Measuring Cup, Turquoise
- Silicone Baking Utensils
How to Make Apple Pie
Step 1. Firstly, preheat the oven temperature to 450 degrees (F) and place a rimmed baking sheet on the center rack while the oven is preheating. Reserve a piece of parchment paper or foil to fit the baking sheet to be used at the time of baking.
Step 2. Meanwhile, make the gluten free pie crust as directed and chill for 1 hour.
Step 3. Then, to make the filling, place the thinly sliced apples in a large bowl and toss with the lemon juice.
Step 4. In a separate medium/small bowl, whisk together the granulated sugar, light brown sugar, cornstarch, cinnamon, nutmeg, cloves, and salt. Break down any lumps.
Step 5. Pour the sugar/spice mixture over the apples and gently mix well to coat all the apples, then set aside.
Step 6. In a small bowl, make the egg wash by beating the egg and whisking in the cream. Set aside until ready to use.
Step 7. Roll out the 1/2 of the chilled crust and place it in a deep-dish pie plate, leaving enough crust as an overhang. Brush the bottom crust with egg wash if desired (see the tips section in the post).
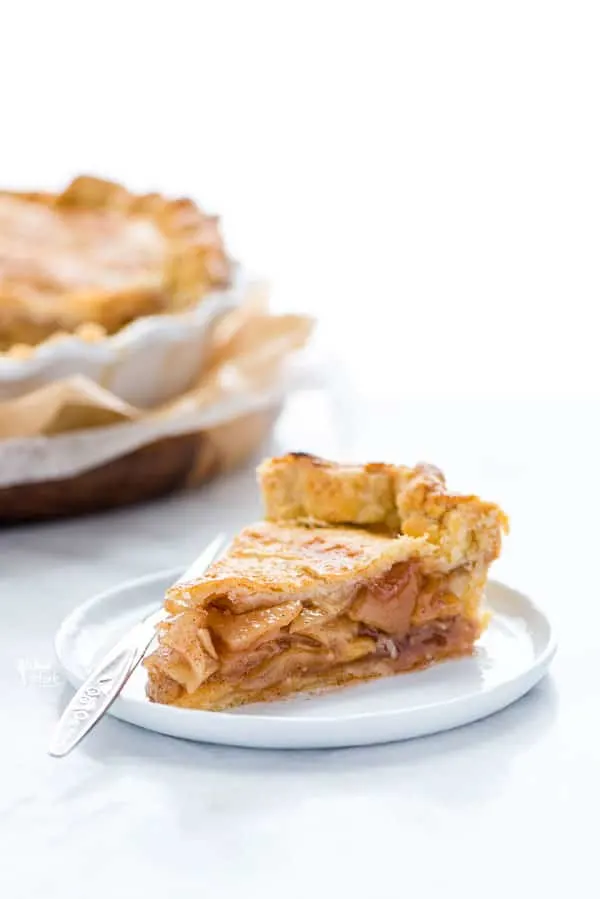
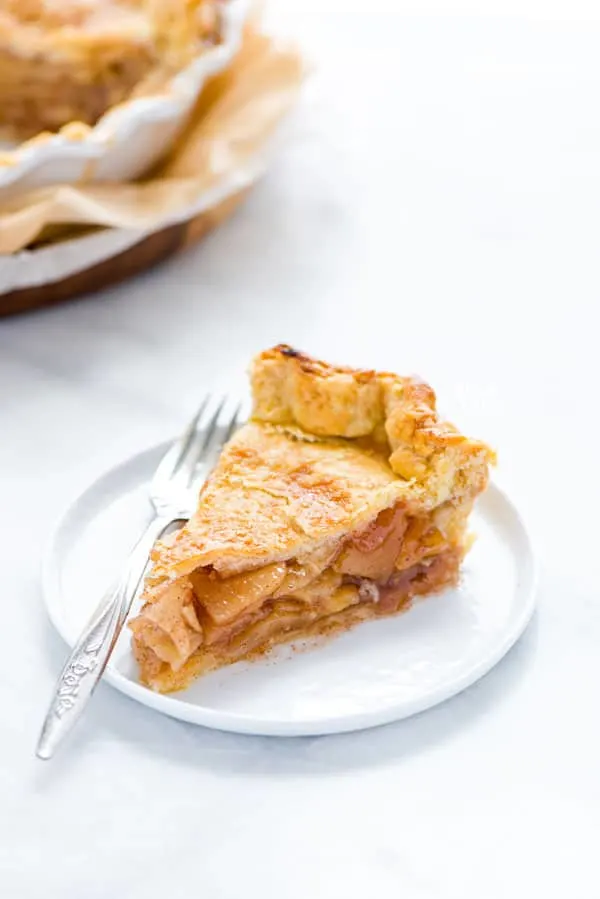
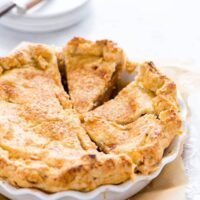
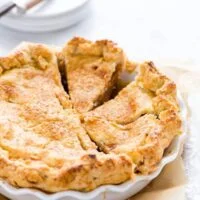
Step 8. Layer the apples evenly in the crust instead of just pouring the apples in. Having flat layers of apples will help the pie keep its shape better and it will help prevent air pockets in the pie. Taking the time to layer the apples is a bit more tedious and time-consuming but worth the effort.

Step 9. Once the apples are layered, pour any excess liquid from the apple bowl over the apples and scatter the cubed butter on top of the apples. Roll out the top crust and carefully place the crust on top of the pie. Gently press the crust down on top of the apples so that it’s resting directly on top of them.
You’re doing great! Almost there!
Step 10. Press the crusts together and crimp the edges to seal the crust. Trim the excess crust before crimping, if needed (I usually don’t need to).
Step 11. Place the pie dough in the refrigerator and chill for 30-45 minutes before baking. This will help the butter in the crust get cold to make a flaky crust once baked.
Step 12. Once the pie has chilled, remove it from the fridge and brush the top of the pie and the crust with the egg wash. Use a sharp paring knife to cut several slits in the top of the pie for venting. Be sure to make the cuts deep enough to go through the crust and wide enough that they don’t close. Sprinkle the pie with coarse sugar, if desired.
Step 13. Carefully place the parchment paper (or foil) on the preheated sheet pan and place the cold pie on top. Bake on the center rack at 450 degrees for 10 minutes.
Step 14. After 10 minutes, lower the temperature to 350 degrees and bake the pie for 45-80 minutes. Meanwhile, tent the pie with aluminum foil to prevent the crust from getting too brown, if needed.
Step 15. When the pie is done, the filling will be bubbling along the edges and in the vents, the apples will be soft when tested with a knife, and the internal temperature is at least 175 degrees F. For best results, the pie should be bubbling for at least 5-10 minutes before removing from the oven.
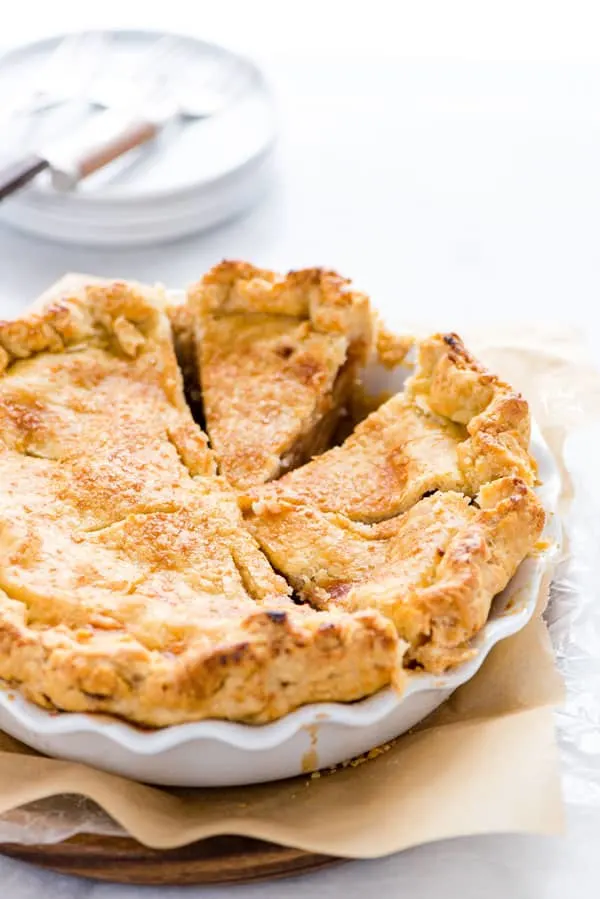
Step 16. Cool the pie on a wire rack for at least 4 hours before serving so the filling can set. Serve at room temperature or chill before serving. (See the tips section of the post for cutting clean slices.)
Tips for Making This Gluten Free Apple Pie Recipe
- Use the right apples! Firm/Crisp apples are the best apples for baking. Using a combination of sweet and tart apples give this gluten free fruit crisp the best flavor, undoubtedly.
- Don’t know what apples to pick? Read my article on choosing the Best Apples for Baking 🍏
- Use COLD ingredients when making the crust! COLD shortening or butter, ICE COLD water, you can even put your flours in the fridge for a bit if your house is on the warm side.
- Brush the inside of the crust with egg wash to help prevent a soggy bottom.
- Layer the apples in the crust instead of dumping them in. This will help prevent and big gaps and the apples will bake more evenly. It will also help prevent a domed crust with shrunken filling.
- Refrigerate the pie for 30 minutes before baking.
- Preheat a rimmed baking sheet in the oven. Placing the pie on a hot sheet pan while baking will help the bottom crust set quickly to help prevent a soggy bottom. The rimmed sheet will also keep any pie juices from spilling all over the bottom of the oven.
- Chill the pie before serving to make it easier to cut and serve. Cold pie slices will come out nice and clean! Once you slice, you can bring the pie to room temperature before serving.

How To Store Leftover Gluten Free Apple Pie
I find that the best way to store it is to put it in an airtight container in the refrigerator for 3-4 days. Make sure to let it cool completely before storing it however.
When you’re ready, you can have it straight out of the refrigerator nice and cold, or let it room up to room temperature. In addition, you could even warm it in the oven for a few minutes if you really wanted to. Then, serve it with vanilla ice cream and you’re good to go!
Can you freeze GF Apple Pie?
To be perfectly honest, it would be best not to freeze this pie. I would say try and eat it up while it’s still fresh. Or, give some to you friends and neighbors!
Other Gluten Free Pie Recipes To Try
Be sure to follow me on Instagram and hashtag #whattheforkfoodblog or tag @whattheforkfoodblog – I love seeing what you make!
If you love this gluten free apple pie recipe from scratch, be sure to follow me on social media so you never miss a post:
| Facebook | Twitter | Pinterest | Instagram | Youtube | Newsletter |


Gluten Free Apple Pie Recipe
Ingredients
- 1 recipe for a Double Crust Gluten Free Pie Crust
- 3 pounds apples peeled and thinly sliced (see notes)
- 2 tablespoons fresh lemon juice
- 1/2 cup 100g granulated sugar
- 1/2 cup 110g light brown sugar, lightly packed
- 1/4 cup 32g cornstarch (see notes)
- 1 1/2 teaspoons 4g ground cinnamon
- 1/2 teaspoon 2g ground nutmeg
- 1/4 teaspoon ground cloves
- 1/2 teaspoon 5g fine sea salt
- 1 large egg room temperature
- 1 tablespoon cream or milk
- 2 tablespoons butter cubed and cold
- Coarse sugar for garnish
Instructions
- Preheat the oven to 450 degrees (F) and place a rimmed baking sheet on the center rack while the oven is preheating. Reserve a piece of parchment paper or foil to fit the baking sheet to be used at the time of baking.
- Make the gluten free pie crust as directed and chill for 1 hour.
- To make the filling, place the thinly sliced apples in a large bowl and toss with the lemon juice.
- In a separate medium/small bowl, whisk together the granulated sugar, light brown sugar, cornstarch, cinnamon, nutmeg, cloves, and salt. Break down any lumps.
- Pour the sugar/spice mixture over the apples and gently mix well to coat all the apples, then set aside.
- In a small bowl, make the egg wash by beating the egg and whisking in the cream. Set aside until ready to use.
- Roll out the 1/2 of the chilled crust and place it in a deep-dish pie plate, leaving enough crust as an overhang. Brush the bottom crust with egg wash if desired (see the tips section in the post).
- Layer the apples evenly in the crust instead of just pouring the apples in. Having flat layers of apples will help the pie keep it’s shape better and it will help prevent air pockets in the pie. Taking the time to layer the apples is a bit more tedious and time-consuming but worth the effort.
- Once the apples are layered, pour any excess liquid from the apple bowl over the apples and scatter the cubed butter on top of the apples. Roll out the top crust and carefully place the crust on top of the pie. Gently press the crust down on top of the apples so that it’s resting directly on top of them.
- Press the crusts together and crimp the edges to seal the crust. Trim the excess crust before crimping, if needed (I usually don’t need to).
- Place the pie in the refrigerator and chill for 30-45 minutes before baking. This will help the butter in the crust get cold to make a flaky crust once baked.
- Once the pie has chilled, remove it from the fridge and brush the top of the pie and the crust with the egg wash. Use a sharp paring knife to cut several slits in the top of the pie for venting. Be sure to make the cuts deep enough to go through the crust and wide enough that they don’t close. Sprinkle the pie with coarse sugar, if desired.
- Carefully place the parchment paper (or foil) on the preheated sheet pan and place the cold pie on top. Bake on the center rack at 450 degrees for 10 minutes.
- After 10 minutes, lower the temperature to 350 degrees and bake the pie for 45-80 minutes. Tent the pie with aluminum foil to prevent the crust from getting too brown, if needed.
- When the pie is done, the filling will be bubbling along the edges and in the vents, the apples will be soft when tested with a knife, and the internal temperature is at least 175 degrees F. For best results, the pie should be bubbling for at least 5-10 minutes before removing from the oven.
- Cool the pie on a wire rack for at least 4 hours before serving so the filling can set. Serve at room temperature or chill before serving. (See the tips section of the post for cutting clean slices.)
Notes
- For this pie, I used 4 medium Honeycrisp Apples and 3 medium Golden Delicious Apples. The number of apples you use will depend on the size so stick to 3 1/4 -31/2 pounds (before peeling and coring), or about 8 cups when sliced.
- For corn free, use Tapioca Starch/Flour in place of the cornstarch.
- Juices from the pie may overflow, which is normal. Just make sure you’re baking the pie on top of a rimmed baking sheet (as directed) to catch the juices and save the bottom of your oven.
- Baking time will vary by oven and type of apple used. Start checking your pie for doneness at 45 minutes and increase baking time as needed.
- Prep time does not include the time to make the crust.
Recommended Products


Nutrition Information
Disclaimers
As an Amazon Associate and member of other affiliate programs, I earn from qualifying purchases.
Nutrition Facts are estimated and aren’t always accurate. Please consult a doctor or nutritionist if you have special dietary needs.
Did you make this recipe? Leave a star rating and let me know in the comments! You can also leave a photo/comment on this pin for others to see.
Where is the recipe for the pie crust?
It is in the post, but here is the link if you need it: https://www.whattheforkfoodblog.com/2015/08/17/gluten-free-pie-crust-recipe/
Where is the recipe for the pie crust?
You can get the pie crust recipe here: https://www.whattheforkfoodblog.com/2015/08/17/gluten-free-pie-crust-recipe/
This was delicious. I had trouble with rolling and transferring the crust, but I think it was because of not having the right flours available, so I made do with what I had. I used cut-outs for the top instead of a one-piece top to make it a little easier. But I’m anxious to try again!
This was the best GF apple pie I have ever eaten! Achieving a perfectly flaky pie crust can be a culinary feat, but this recipe accomplishes it effortlessly. It’s not just “good for gluten-free”; it’s genuinely exceptional.
Thanks so much Sonia!
SO apple pie is my all-time favorite dessert — I always ask for it as my “birthday cake.” Since my birthday is not until July (lol) I decided I better get my fix now — and made yours, recipe was easy to follow and the gluten-free crust was fantastic.
My sister always asks for apple pie for her birthday too, it’s just too good!
I recently tried your recipe and it was truly amazing! Even my sister loved it. I also liked that it was easy to follow, and the use of natural ingredients really made the flavors of the pie stand out.
Thanks Chanel!
What I appreciate most about this recipe is that it doesn’t compromise on taste or texture. It’s just as delicious and comforting as the classic apple pie I grew up with. Plus, it’s a hit with my friends and family! Thank you so much for sharing this recipe!
Thanks Tammy! Glad to hear you enjoy it so much!
I have been making pies for over 30 years. I learned to be our family’s “pie lady” from my grandmother. Recently my teenage child cut out gluten and found they felt a lot better for the choice. I am used to baking for my family and have felt lost with gluten free baking. Thanks for the pie crust recipe that let me try an apple pie again this year for Thanksgiving. I wish I could send a photo here… it look wonderful! I even made a lattice top (my usual).
You’re welcome! I’m so glad your family was able to still enjoy pie this Thanksgiving and you can continue being the “pie lady”!
Thank you for this delicious recipe and the easy-to-follow instructions. This came out perfectly! The crust was crispy and delicious, and the filling was tart and sweet at the same time (I used a bit less sugar). Only one problem: no way we could wait 4 HOURS to eat it! It was devoured, still piping hot, after 20 minutes.
You’re very welcome!